REQUIRED TOOLS
- Grinder
- Hammer
- Punch
- Vice
- 10mm socket wrench
REQUIRED PARTS
- Tom's replacement spring
- 6 rivets
INSTALLATION
Remove the screw and the flange. You might have to
gently pry it out using a flat screw driver.
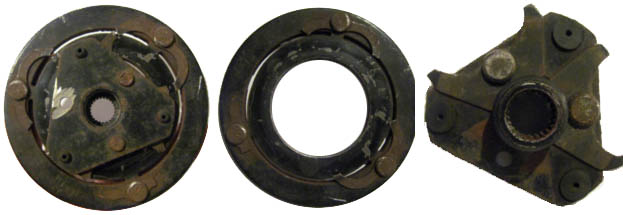
Remove the 6 rivets holding the broken springs.
Using a grinder, cut the rivet head flush then punch
the rivet out using a punch and a hammer. Be sure to
support your part properly while punching to avoid
bending the shaft flange or the drive plate.
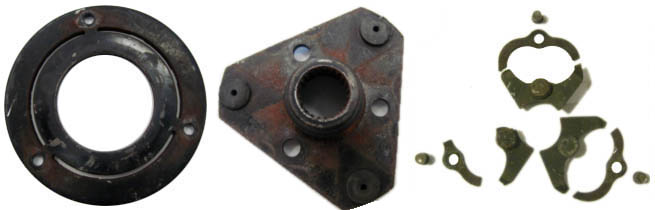
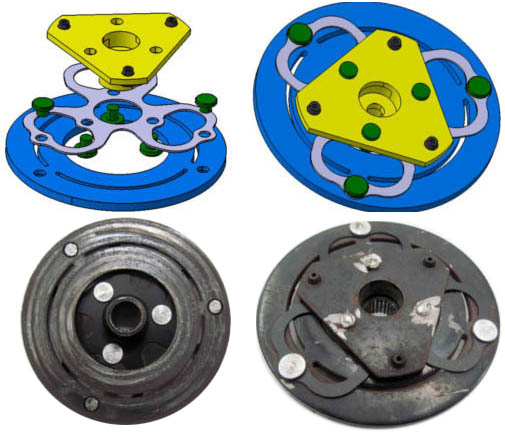
Install the new spring on the flange first. Make
sure to put the flat head of the rivet on the spring
side. You can use a vice to form the tail of the
rivet or just smash it using a hammer.

Install the drive plate on the spring. Make sure to put the flat head of the rivet on the spring side. Start forming the tail of the rivet in the vice then using a hammer, hit the rivet until the tail is flush with the drive plate.
2015 VERSION
Follow the same installation instructions and make sure to install the spring in the correct orientation:


Re-install the clutch on your compressor. You will have to hold the drive plate while you tighten the screw.

Enjoy you air conditioning!!!
Things to do when you notice broken springs
First, order a spring replacement kit.Then, in the meantime, you can remove the drive plate to prevent any further damage:
- Remove the screw in the center of the compressor.
- Remove the flange (triangle part) and drive plate.
- Remove the 6 rivets securing the spring to the flange and drive plate. (see installation instructions for details)
- Save the drive plate for later and re-install the flange and screw without the drive plate. This is to avoid losing the shim washers that are between the compressor shaft flange and the compressor. At this step, you can also verify that the compressor is not seized. You should be able to rotate the flange by hand.
Rubber bumpers
When the springs fail they might kick off some of the 3 rubber bumpers from the flange. So you may be missing a few or all of the rubber bumpers. That’s no big deal, since they are not required for the operation of the compressor. They are there to prevent vibration when the AC is turned off. Then the drive plate sits on the rubber bumpers. You can try to find some at the hardware store and sand them down to the required thickness. Or you can use silicone to make custom bumpers with the right thickness. Or you can just leave it like that. Here are the dimensions of the OEM rubber bumpers.Installation video